
Arduino Tutorial – Chapter 2.5: The Arduino IDE
Introducing the Arduino IDE
Now that we’re wired up, let’s tackle the sketch. If you haven’t already, you’ll need to download and install the Arduino IDE – refer to the resources section at the end of the book for detailed instructions on how to do this.
Once it’s installed, fire the IDE up. You should get a screen that looks like this:
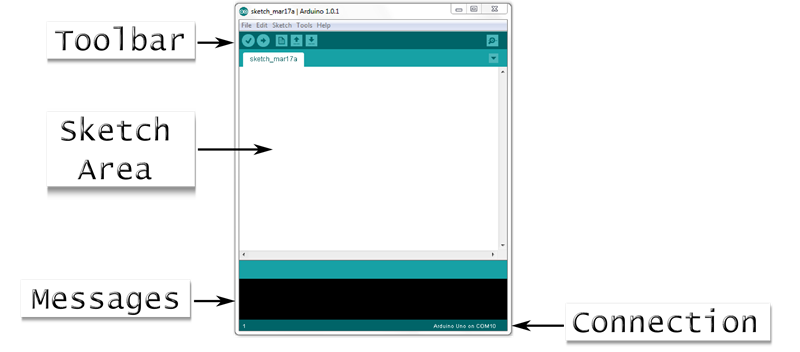
I’ve highlighted a few regions of the screen:
Toolbar
This works the in the same way as the toolbar in any other application, and has the following tools:
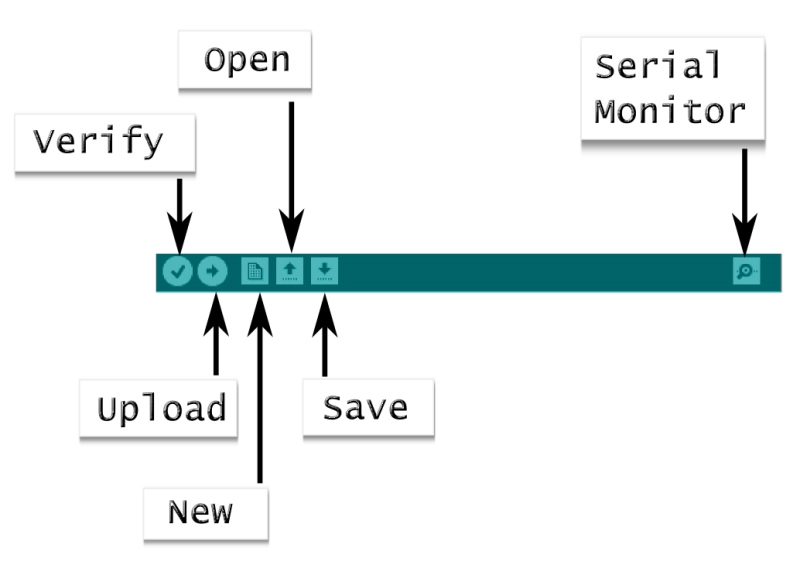
Verify button: This checks through the sketch to ensure that it is written in a way that the Arduino can understand – a process called “compiling”. If the sketch compiles correctly, you’ll see a message “Done Compiling” in the message area. If not, you’ll see a list of errors that the compiler has picked up – these are there to help you correct your sketch, although they can sometimes be a little cryptic.
Upload button: This button uploads the sketch to your Arduino. The board must of course be connected with a USB cable. Before uploading, the IDE compiles the sketch and will only upload the sketch if there are no errors.
New button: This creates a new, empty sketch.
Open & Save buttons: These either open an existing sketch, or save the current one. Sketches are saved in a “Sketchbook” – you can see all sketches in your sketchbook from the File-Sketchbook menu.
Serial Monitor button: This is a way to communicate with your sketch while it’s running on the Arduino, via the USB port. It’s very useful, and we’ll work with it in later chapters.
Sketch Area
This is where you type your sketch. We’ll work with this in a moment.
Messages
The Arduino IDE feeds back to you here on the success of operations you’ve attempted – especially useful for letting you know if your sketch compiled and uploaded successfully.
Connection
This shows which type of Arduino board you’re connected to, as well as the serial port you’re connected on.