
Arduino Tutorial – Chapter 3.1: Loops and Traffic Lights
Purpose
We’re going to kick this chapter off with a little more programming theory. We need to get a few of these programming structures under our belt before we get stuck into more complex projects. Let’s start out with where we left off in the last chapter.
Loops
Before carrying on, modify the sketch from the previous chapter to so that it transmits an S.O.S. in morse code – 3 short flashes, 3 long flashes, and 3 short ones. Make the long flashes 1.5 seconds, and the short flashes 0.5 seconds.
Depending on how you did this, you could have found it a bit repetitive. Let’s look at an alternate way of doing this.
The “For” Loop
The basic “for” loop works by performing a specific number of repetitions. The loop is made up of a statement, and a block of code enclosed in curly braces. The code in the curly braces repeats as long as the statement is valid. Let’s look at an example:
{
digitalWrite(x, HIGH);delay(100);
}
This example will make the Arduino pins 3 to 10 go HIGH as the digitalWrite statement is enclosed in the curly braces. For example, if there were LEDs attached to these pins, they would all light up in sequence every 100 milliseconds. The “for” statement has three parts to it:
int x=3: This is the declaration, that defines a variable called “x” and assigns it an initial value of 3
x <= 10: This is the condition that is tested. The loop will continue as long as the variable x is less than or equal to 10
x = x+1: This is the incrementer. Each time the loop runs, the variable x increases in value by 1.
The effect of the above is that the loop runs 8 times, and for each iteration:
- the value of the variable “x” increases: 3,4,5,6,7,8,9,10.
- the digitalWrite statement makes the pin “x” go HIGH
- the sketch waits for 100 milliseconds
When the variable “x” reaches a value of 10, the loop stops and the rest of the sketch continues to execute.
“while” and “do…while” loops
These are other types of loops, which we won’t tackle right now. If you’re feeling like you need a challenge, then pop over to the Arduino website and take a look at them. They give you more flexibility in how you control the loop, and don’t work off a counter structure.
One Solution to the SOS problem
Did you have a go? There are a number of ways that we could make this work – some fairly complex. For now, let’s work with the most straightforward:
// Chapter 3: S.O.S.
// Flash in Morse Code, using a loop
// Define pin variables
byte pinLed = 13;
void setup()
{
// Initialize the pin as an output
pinMode(pinLed, OUTPUT);
}
void loop()
{
//3 Short Flashes
for (int x=0; x<3; x=x+1)
{
digitalWrite(pinLed, HIGH); // Turn the LED on
delay(500); // Short
digitalWrite(pinLed, LOW); // Turn the LED off
delay(500); // Short
}
//3 Long Flashes
for (int x=0; x<3; x=x+1)
{
digitalWrite(pinLed, HIGH); // Turn the LED on
delay(1500); // Long
digitalWrite(pinLed, LOW); // Turn the LED off
delay(1500); // Long
}
//3 Short Flashes
for (int x=0; x<3; x=x+1)
{
digitalWrite(pinLed, HIGH); // Turn the LED on
delay(500); // Short
digitalWrite(pinLed, LOW); // Turn the LED off
delay(500); // Short
}
}
How did your version compare to this one? Does this solution make sense? Can you see that there are three loops, each repeating three times? Each iteration of the loop instructs pin 13 to flash on and off – the only difference between the three loops is the duration that the LED is on and off for. If you wanted to take this to the next level, you could create another loop to reduce the repetition further – a parent-loop that would repeat 3 times, containing a child-loop that flashed three times. However, to achieve this, you’d need to use the “if” statement which we’ll look at in detail in the following chapter.
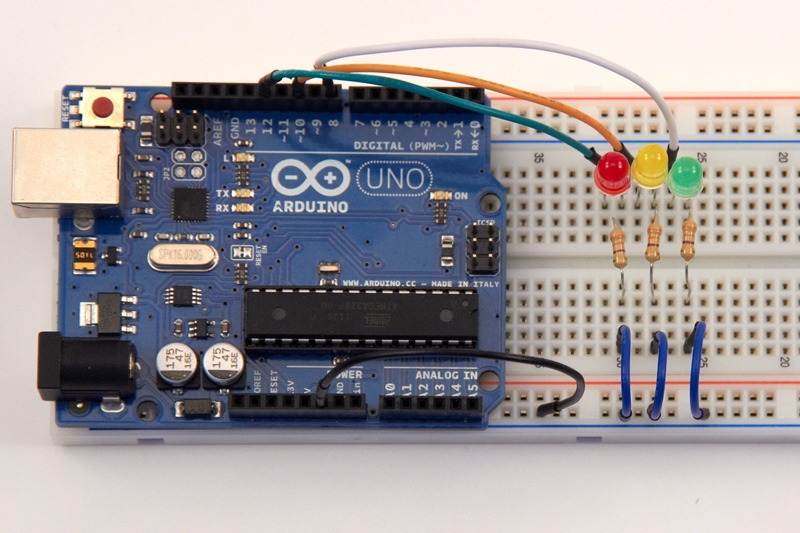
Arduino Tutorial – Chapter 3: Build the Arduino Traffic Light…
Leave a Reply